Category: Uncategorized

  • CELPIP Speaking Task 7: How to Talk for 90 Seconds (The 1-3-1 Blueprint)

    CELPIP Speaking Task 7: How to Talk for 90 Seconds (The 1-3-1 Blueprint)

    You look at the timer. You have been talking for what feels like an hour. You check the screen: only 45 seconds have passed. You still have 45 seconds left.

    Suddenly, panic sets in. You repeat your last point. You say “um” and “ah.” You drift into awkward silence.

    Unfortunately, this is the most common way students lose points on CELPIP Speaking Task 7.

    Unlike the other tasks, which are 60 seconds, Task 7 requires you to speak for a full 90 seconds on a complex opinion topic. To survive this marathon, you don’t need more vocabulary; you need more structure.

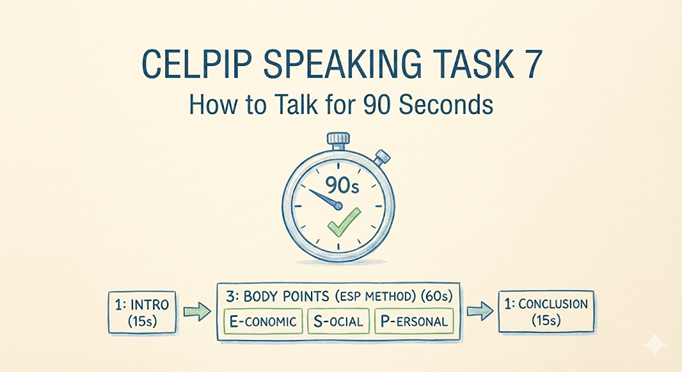
    Below is the detailed “1-3-1 Blueprint,” a proven formula that will help you fill the time with high-quality content every single time.

    The Challenge: Why 90 Seconds is So Hard

    First, we must accept that 90 seconds is an eternity in exam time. Most people run out of ideas after 45 seconds.

    Specifically, the trap is “going deep” on just one point. If you spend 60 seconds talking about one reason, you will repeat yourself and sound disorganized.

    Therefore, the secret is not to dig a deep hole, but to dig three separate holes. You need width, not just depth.

    How to Use Your 30 Seconds of Prep (The “ESP” Trick)

    Before you speak, you have 30 seconds to think. Do not waste this staring at the screen.

    Instead, use the “ESP” Method to instantly generate three distinct arguments:

    1. E – Economic: Does this save money, make money, or affect the economy?
    2. S – Social: How does this affect people, families, or relationships?
    3. P – Personal/Physical: How does this affect health, mental state, or daily life?

    Consequently, when the timer starts, you already have your three body paragraphs ready to go.

    The “1-3-1” Blueprint in Action

    Next, let’s look at a real example. Prompt: Do you think remote work should become permanent for all companies?

    Using the “1-3-1” structure (1 Intro, 3 Points, 1 Conclusion), here is how a CLB 9 answer looks.

    1. The Intro (10-15s)

    Start with a clear hook and your definitive opinion.

    • “That is a highly debated topic in today’s workforce. Personally, I strongly advocate for remote work becoming the new standard for most businesses.”

    2. Point 1: Economic (20s)

    First, tackle the money aspect.

    • “First of all, from an economic perspective, remote work saves massive amounts of money for both employers and employees. Companies can reduce their office rent, while workers save on gas and commuting costs.”

    3. Point 2: Social/Mental Health (20s)

    Secondly, move to the human aspect.

    • “Secondly, looking at the social benefits, working from home allows for a much healthier work-life balance. Parents can spend more time with their children, which leads to happier, more productive employees.”

    4. Point 3: The “Concession” (20s)

    Crucially, use your third point to address the opposition. This fills time and shows critical thinking.

    • “Admittedly, some critics argue that remote work destroys team culture. However, I believe that with modern video tools like Zoom, we can maintain strong connections without being in the same room.”

    5. The Conclusion (10-15s)

    Finally, wrap it up smoothly.

    • “For these reasons—financial savings, better mental health, and modern technology—I am convinced that remote work is the future.”

    Emergency Tactics: What If I Freeze?

    Admittedly, even with a plan, you might freeze at the 70-second mark. What then?

    Don’t panic. Use the “Personal Story” Eject Button.

    If you run out of general arguments, instantly switch to a personal example.

    • “For instance, my own brother started working remotely last year, and I have seen how much his stress levels have dropped…”

    This tactic is a lifesaver. It is easy to talk about yourself, and it naturally fills 15-20 seconds.

    Why You Need Realistic Practice

    Undoubtedly, reading this script is easier than speaking it.

    You need to feel the internal clock. You need to know exactly when to switch from Point 1 to Point 2 without looking at a stopwatch.

    Ultimately, this is why Exam Hero is essential for Task 7.

    • The “ESP” Drills: We give you random topics and force you to brainstorm Economic, Social, and Personal points in 30 seconds.
    • Stamina Training: Our AI Timer simulates the pressure. If you stop talking at 60 seconds, you fail the drill.
    • Flow Analysis: We analyze your transition words. Did you use “First,” “Secondly,” and “However”? If not, we tell you immediately.

    [Build your 90-second stamina with the Smart AI Coach.]

  • CELPIP Reading Task 4: The Detective Method for Viewpoints

    CELPIP Reading Task 4: The Detective Method for Viewpoints

    You reach the final section of the Reading test. You are tired. You see an article about a controversial topic, like “Banning Plastic Bags” or “School Uniforms.”

    Suddenly, the questions get harder. They don’t ask for facts like dates or names. They ask: “What would the writer most likely agree with?” or “How does the second commenter feel about the proposal?”

    You scan the text for the answer, but it’s not there.

    Unfortunately, you cannot “find” the answer because it isn’t written. You have to infer it.

    This is CELPIP Reading Task 4: Reading for Viewpoints. To solve it, you need to stop acting like a student and start acting like a Detective.

    The Core Problem: Fact vs. Inference

    First, you must understand why this task is unique. In Tasks 1-3, you are a “Fact Hunter.” You look for a keyword, find the sentence, and match the answer.

    In contrast, Task 4 tests “Inference.” You must read between the lines to understand the hidden opinions of the people involved.

    Therefore, if you only look for matching words, you will choose the “distractor” answers every time. You need the “Detective Method.”

    Step 1: Profile the “Suspects” (The Speakers)

    Immediately upon reading the article, identify the key players. Usually, there are 2-3 distinct groups or people mentioned.

    Specifically, create a quick mental profile for each:

    1. Who are they? (e.g., “The Shop Owners” vs. “The Environmentalists”)
    2. What is their motive? (e.g., “Shop owners want to save money,” “Environmentalists want to save the ocean”)
    3. What is their Tone? (e.g., “Angry,” “Hopeful,” “Resigned”)

    Consequently, when a question asks, “How would the shop owners react to a tax increase?”, you don’t need to find a sentence about taxes. You know their motive is saving money, so you can infer they would be angry.

    Step 2: Spot the “Hidden Clues” (Modals & Adjectives)

    Next, look for the subtle words that reveal a suspect’s true feelings. A Detective looks for micro-expressions; you look for modals and adjectives.

    • The “Polite No”: If a writer says, “While the plan has merit, it may be premature,” they are actually saying NO.
    • The “Hidden Yes”: If they say, “It is a step in the right direction,” they support it, but with reservations.
    • The “Intensifiers”: Words like clearly, obviously, or undeniably signal a very strong, unshakeable opinion.

    Step 3: Solve the “Comment” Mystery

    The second half of Task 4 is a “Reply Comment” with fill-in-the-blanks. This is where most students lose points.

    Crucially, the commenter is usually reacting to the main article. To fill the blanks, you must determine: Is this person a friend or an enemy of the main writer?

    • If they are an Enemy: They will use sarcasm or contrasting words (However, actually, unfortunately).
    • If they are a Friend: They will echo the main writer’s points using synonyms.

    Ultimately, once you identify their “allegiance,” the missing words become obvious.

    Why You Can’t Practice This with Simple Articles

    Admittedly, you can practice reading news online. However, generic news articles don’t test your ability to infer bias under time pressure.

    You need training materials that are specifically designed to be “tricky.”

    This is where Exam Hero gives you the edge.

    • Inference Drills: Our questions force you to guess the speaker’s mood, not just their words.
    • Bias Detection: We highlight the “hidden clue” words so you learn to spot sarcasm and “soft no’s.”
    • Timed Profiling: Learn to identify the “suspects” and their motives in under 60 seconds.

    [Stop searching for words. Start solving the case with Exam Hero.]

  • CELPIP Listening Task 6: Mastering Viewpoints (The Pivot Strategy)

    CELPIP Listening Task 6: Mastering Viewpoints (The Pivot Strategy)

    The audio begins. A man and a woman are debating a complex topic, like “Universal Basic Income” or “banning cars in the city center.” They talk for three long minutes. They switch sides. They agree on some points but disagree on others.

    By the end, you are completely confused about who supports what.

    Undoubtedly, CELPIP Listening Task 6 (Viewpoints) is the hardest part of the Listening test. It tests your ability to follow a winding, abstract argument.

    However, you do not need a degree in philosophy to score a CLB 9. You just need to stop listening for facts and start listening for “pivots.”

    Below is the “Contrast Mapping” strategy to help you track the debate without getting lost.

    The Trap: Listening for Facts

    First, understand why you are failing. In earlier tasks, you listened for facts (e.g., “The bus arrives at 3 PM”).

    In contrast, Task 6 is about opinions. The speakers often state a fact only to disagree with it immediately.

    • Example: “Some people say that banning cars would reduce pollution.” (This is not the speaker’s opinion; it’s a general statement).
    • Next Sentence:However, I believe it would destroy local businesses.” (This IS the speaker’s opinion).

    Consequently, if you write down “reduce pollution” as the man’s opinion, you get the answer wrong. You missed the pivot.

    The “Pivot Word” Strategy

    Therefore, your ears must be trained to hunt for Pivot Words. These are the signals that the speaker is about to state their real view.

    Specifically, listen for these three categories:

    1. The Disagreement Pivot (The “But”)

    When you hear these, the speaker is rejecting the previous idea.

    • Keywords: However, On the other hand, Although, Conversely.
    • Action: If you hear this, cross out your previous note. The real opinion is coming next.

    2. The Agreement Pivot (The “Yes”)

    When you hear these, the speaker is aligning with the other person.

    • Keywords: Precisely, I couldn’t agree more, That’s a valid point, Exactly.
    • Action: Draw a (+) symbol next to the speaker’s name in your notes.

    3. The “Soft” Disagreement (The “Yes, but…”)

    This is the trickiest one. They agree politely before destroying the argument.

    • Keywords: While that may be true…, I see where you’re coming from, but…
    • Action: Wait for the “but.” Everything before the “but” is polite fluff. Everything after is the answer.

    How to Take Notes: The “VS” Column

    Next, you need a better note-taking system. Do not write sentences.

    Instead, create a simple “VS” (Versus) chart on your paper.

    • Left Side: Pro-Topic (e.g., “For Banning Cars”)
    • Right Side: Anti-Topic (e.g., “Against Banning Cars”)

    As you listen, when the man makes a point, put a letter “M” on the side he supports. If the woman agrees, put a “W” next to him. If she disagrees, put a “W” on the opposite side.

    Ultimately, this gives you a visual map of the debate. You can look at your paper and instantly see: “The Man is mostly on the Left, but the Woman is on the Right.”

    Why You Need to Train Your “Pivot Ears”

    Admittedly, spotting these words in a fast conversation is hard. You might know the word “Conversely” when reading, but can you hear it when spoken quickly?

    Unfortunately, reading this blog post is not enough. You need active ear training.

    This is where Exam Hero excels.

    • Pivot Drills: We highlight the transition words in our audio exercises so you learn to hear them.
    • Complex Debates: Practice with 3-minute arguments on tough topics like economics, education, and technology.
    • Comprehension Checks: We test if you understood the relationship between speakers, not just the topic.

    [Stop getting lost in the debate. Master Task 6 with Exam Hero.]

  • CELPIP Speaking Task 8: How to Describe Unusual Situations

    CELPIP Speaking Task 8: How to Describe Unusual Situations

    You look at the screen. You expect to see a family having dinner. Instead, you see a picture of a giraffe standing in a living room, or a woman wearing a dress made entirely of balloons.

    Immediately, your brain freezes. You think, “I don’t know how to explain this!”

    This is CELPIP Speaking Task 8: Describing an Unusual Situation. It is designed to test your ability to handle the unexpected.

    Fortunately, you do not need to be a vocabulary genius to ace this task. You just need to learn the art of improvisation. Specifically, if you don’t know the word for something, you must describe around it.

    Below is the guide to mastering the “weirdest” part of the CELPIP test without panicking

    The Golden Rule: Never Stop Talking

    First, understand that the raters know the image is strange. They are not checking if you know the word “giraffe.” They are checking if you can keep communicating effectively when you face a vocabulary gap.

    Therefore, the worst mistake you can make is silence. Crucially, if you forget a word, never say “I don’t know” or “I forget.”

    Consequently, you must use the “Definition Technique.” If you cannot name the object, describe what it looks like or what it does.

    • Forgot “Telescope”? Say: “It is a long metal tube used for looking at the stars.”
    • Forgot “Monocle”? Say: “He is wearing a single round glass over one eye.”

    The 3-Step Structure for Task 8

    Next, you need a structure to keep your answer organized. You have 60 seconds to describe the scene to someone who cannot see it (usually “your wife” or “a police officer”).

    Use this simple formula:

    1. The Context (10-15 Seconds)

    Start by setting the scene. Where are you? Who are you calling?

    • Example: “Hi honey, you won’t believe what I am looking at right now. I’m walking down Main Street and there is a really strange situation.”

    2. The Detailed Description (40 Seconds)

    Then, describe the specific oddities. Use prepositions to guide the listener’s eye (e.g., “In the center,” “On the left”).

    • Example: “In the middle of the park, there is a large statue. Surprisingly, it looks like it is made entirely of recycled plastic bottles. It is shaped like a giant dinosaur.”

    3. The Reaction (5-10 Seconds)

    Finally, close with a reaction or a next step.

    • Example: “It is absolutely hilarious. I’m going to take a picture and send it to you right now!”

    Essential Vocabulary for “Weird” Things

    Furthermore, since you will be describing strange objects, you need “vague” vocabulary that sounds professional.

    Instead of saying “thing” or “stuff,” use these precise descriptors:

    • Resembles: “The object resembles a classic car.”
    • Appears to be: “The animal appears to be wearing a hat.”
    • Peculiar: “It is a very peculiar scene.”
    • Bizarre: “The situation is quite bizarre.”

    Why You Need Random Practice

    Admittedly, reading about CELPIP Speaking Task 8 is easy. However, doing it is hard because you cannot predict the image.

    Since you might get a picture of a flooded basement or a dog driving a car, memorizing answers is impossible. Instead, you need to train your brain to react instantly to anything.

    Ultimately, this is why the Smart AI Coach is your best tool.

    • Random Scenarios: We generate hundreds of weird, unexpected images to test your improvisation skills.
    • Vocabulary Support: If you get stuck, our AI suggests the exact word you needed (e.g., “That’s called a ‘unicycle’”).
    • Confidence Building: After practicing 20 “weird” tasks, the real exam will feel easy.

    [Prepare for the unexpected. Practice Task 8 with Exam Hero.]

  • CELPIP Writing Task 2 Survey: The Pick a Side Strategy

    CELPIP Writing Task 2 Survey: The Pick a Side Strategy

    You have 26 minutes left. The screen shows a survey from your city council. They ask: “Should we build a new public park or a multi-story parking lot?”

    Immediately, you start typing. You write about how parks are beautiful, but parking is also necessary. Trying to be balanced. You try to be fair.

    Unfortunately, you just fell into the biggest trap in CELPIP Writing Task 2 Survey.

    The test raters are not looking for a balanced politician. They are looking for a decisive writer. If you try to support both sides, your opinion becomes weak, and your score drops.

    To get a CLB 9+, you must master the “Pick a Side” Strategy. Below is the guide on how to be opinionated, structured, and successful.

    The Golden Rule: No Fence-Sitting

    First, you must understand the goal. The prompt asks for your opinion.

    Therefore, your opinion must be 100% clear from the first sentence to the last. Do not “sit on the fence.”

    • Weak Score: “Both options have good points. The park is green, but the parking lot helps cars.” (This is confusing).
    • CLB 9 Score: “I strongly believe that building a new park is the superior choice for our community.” (This is clear).

    Consequently, you should pick the option that is easiest to write about, even if you don’t actually agree with it in real life.

    The 4-Paragraph Structure

    Next, forget about improvisation. Use this strict structure every time you answer a CELPIP Writing Task 2 Survey.

    Paragraph 1: The Clear Choice

    Start by acknowledging the survey and stating your choice immediately.

    • Example: “I appreciate the opportunity to share my thoughts on this development. In my opinion, building the park is definitely the better option.”

    Paragraph 2: The First Strong Reason

    Then, provide your main argument. Focus on one clear benefit.

    • Example: “First, a park would significantly improve the health of our residents. Green spaces encourage exercise and provide a safe place for children to play.”

    Paragraph 3: The “Attack” (Why the other option is bad)

    Crucially, do not just praise your choice. Explain why the other option is a mistake. This shows complex critical thinking.

    • Example: “Conversely, a parking lot would only increase traffic congestion. It would bring more noise and pollution to our quiet neighborhood, which is detrimental to our quality of life.”

    Paragraph 4: The Conclusion

    Finally, restate your opinion in one sentence.

    • Example: “For these reasons, I am convinced that the park is the right investment for our future.”

    Essential Vocabulary for Opinions

    Furthermore, you need to use strong words to sell your idea. Stop saying “I think” or “good.”

    Instead, use these power words:

    • Undoubtedly: “Undoubtedly, this change will benefit everyone.”
    • Superior: “Option A is the superior choice.”
    • Detrimental: “Option B would be detrimental to local businesses.”
    • I am convinced that: “I am convinced that we must act now.”

    Why You Need Feedback on Your Tone

    Admittedly, this strategy looks simple on paper. However, executing it under the pressure of a timer is difficult.

    Many students try to be “strong” but end up sounding “rude.” Alternatively, they try to be “polite” and end up sounding “weak.”

    Ultimately, you cannot fix your tone by yourself. You need an expert to check your work.

    This is where Exam Hero helps you win.

    • Opinion Strength Check: Our AI analyzes your writing to ensure you “picked a side” clearly.
    • Vocabulary Upgrades: If you use basic words like “bad,” we suggest “detrimental” instantly.
    • Timing Drills: Practice writing full survey responses in 26 minutes so you never run out of time.

    [Stop guessing. Start writing CLB 9 surveys with Exam Hero.]

  • Stop Writing Everything Down: The Grid Method for CELPIP Listening

    Stop Writing Everything Down: The Grid Method for CELPIP Listening

    The audio starts. You grab your pen. Immediately, you start furiously scribbling every word you hear. By the time the audio finishes, your hand hurts, your page is full of messy sentences, and you have no idea what the main point of the conversation was.

    Does this sound familiar?

    Unfortunately, this “transcription approach” is the fastest way to fail the CELPIP Listening section. You cannot write as fast as a native speaker talks. Consequently, when you try to capture everything, you miss the crucial context clues needed to answer the questions.

    To hit CLB 9+, you need to stop transcribing and start strategizing. Below is the “Grid Method,” a simple note-taking system that forces you to focus only on what matters.

    The “Transcription Trap” Why Less Is More

    Admittedly, it feels safer to write everything down. You worry that if you don’t write it, you will forget it.

    However, the human brain struggles to perform two complex tasks, active listening and writing full sentences—simultaneously. As a result, when you focus on writing, your brain stops processing the meaning behind the words.

    Therefore, the goal of CELPIP Listening notes is not to create a transcript. It is to create a “cheat sheet” of keywords that triggers your short-term memory when the questions appear.

    How to Use the “Grid Method”

    Next, let’s replace your messy notes with a structured grid. Do this before the audio starts.

    Specifically, draw a simple “T-chart” or grid on your scratch paper. Label the columns based on the task type.

    For Conversations (Parts 1-3):

    • Column 1: Speaker A (e.g., Man)
    • Column 2: Speaker B (e.g., Woman)
    • Column 3: Topic/Problem

    As you listen, only write keywords under the correct person’s column. Use symbols like (+) for agreement or (-) for disagreement. This makes it instantly clear who holds which opinion.

    What to Write (And What to Ignore)

    Knowing what to put in the grid is crucial.

    Crucially, focus on “Unchangeable Keywords”:

    • Names: (Write “Sarah,” not “her friend”)
    • Dates/Times: (Write “Tuesday @ 3pm”)
    • Locations: (Write “Library”)
    • Strong Opinions: (Write “Hates new policy (-)”)

    In contrast, ignore the fluff:

    • Ignore full sentences. (Never write “The man said he was going to…”)
    • Ignore filler words. (Um, ah, like, you know…)
    • Ignore minor details. (If the main topic is a lost job, don’t write down what they had for lunch).

    The “Video Task” Myth (Task 5)

    Furthermore, this strategy is vital for the dreaded Video Task.

    Many students panic and try to write down visual details, like the color of the curtains or what is on a coffee table. Surprisingly, the CELPIP test rarely asks about these background details. The questions focus on the conversation and the speakers’ attitudes.

    Consequently, keep your eyes on the screen to gauge emotions, but keep your pen focused on the dialogue keywords in your grid.

    Why You Cannot Practice This with a Book

    Reading about the “Grid Method” for CELPIP Listening is easy. Applying it under time pressure when people are speaking fast Canadian English is hard.

    You cannot train your ears with a static textbook. You need realistic, dynamic practice.

    Ultimately, this is why the Smart AI Coach is essential.

    • Realistic Audio: Practice with hundreds of conversations that mimic real CELPIP speeds and accents.
    • Active Comprehension: Our questions are designed to test if you caught the keywords, not the fluff.
    • Instant Feedback: See immediately which details you missed so you can refine your note-taking strategy for the next round.

    [Stop transcribing. Start listening strategically with Exam Hero.]

  • The Lazy Guide to CELPIP Reading: Why You Shouldn’t Read the Whole Passage

    The Lazy Guide to CELPIP Reading: Why You Shouldn’t Read the Whole Passage

    You open the Reading section. You see a long article about Canadian history or a complex email chain. Immediately, you start reading from the first word to the last. Five minutes later, you are only halfway through, and the timer is flashing red.

    Surprisingly, your hard work is actually hurting your score.

    In fact, the highest-scoring students are often the “laziest” readers. They do not read every word. Instead, they use strategic shortcuts to find the answers without wasting time on the fluff.

    Below is the “Lazy” Guide to CELPIP Reading, showing you exactly how to skim, scan, and score a CLB 9 without reading the whole passage.

    The “First and Last” Rule (Skimming)

    First, you must understand the structure of English writing. Typically, the most important information is not hidden in the middle of a paragraph. It is at the edges.

    Therefore, when you first look at a text, do not read the body sentences. Exclusively, read:

    1. The Title: This tells you the main topic.
    2. The First Sentence of Each Paragraph: This usually contains the “Main Idea.”
    3. The Last Sentence of Each Paragraph: This often summarizes the point.

    Consequently, by reading only these specific lines, you build a “mental map” of the article in under 60 seconds. You know where information is located without getting bogged down in details.

    The “Keyword Hunter” Strategy (Scanning)

    Next, stop reading the text and look at the questions. Crucially, you should never read the text deeply until you know what you are looking for.

    Specifically, look for “Unchangeable Keywords” in the questions. These are words that cannot be paraphrased, such as:

    • Names: “Mr. Smith,” “Vancouver,” “RCMP.”
    • Dates & Numbers: “1999,” “$500,” “50%.”
    • Technical Terms: “Photosynthesis,” “Visa Application.”

    Once you find these keywords in the question, go back to the text and scan for them. Do not read the sentences; just move your eyes until you spot the matching word. Then, read only the sentence around that keyword to find your answer.

    The Trap of “Interesting” Articles

    Admittedly, sometimes the articles are interesting. You might want to learn about the history of beaver dams in Canada.

    However, you must resist this urge. Unfortunately, the test is designed to distract you with interesting but irrelevant details. If you stop to “learn,” you lose time.

    Ultimately, treat the text like a data mine. You are there to extract specific nuggets of gold (answers), not to enjoy the scenery. If a sentence does not contain a keyword from a question, ignore it completely.

    Why “Lazy” Reading Requires Practice

    Undoubtedly, skimming feels uncomfortable at first. Your brain wants to read everything to feel safe.

    Consequently, breaking this habit takes training. You cannot learn to speed-read by staring at a static PDF book. You need a tool that forces you to go faster.

    This is where Exam Hero gives you the edge.

    • Timed Drills: Our AI forces you to answer questions under tight time limits, training your brain to panic less and scan more.
    • Keyword Highlighting: Learn to instantly spot the difference between a “distractor” word and a “key” word.
    • Progress Tracking: See your reading speed improve day by day as you master the art of the “Lazy” read.

    [Stop reading every word. Start scoring higher with Exam Hero.]

  • CELPIP Speaking Task 1 Template: How to Give Advice Like a Pro

    CELPIP Speaking Task 1 Template: How to Give Advice Like a Pro

    The test starts. The recording begins. You have 90 seconds to give advice to a friend, family member, or colleague. Your mind goes blank. How do you start?

    Undoubtedly, Speaking Task 1 sets the tone for your entire exam. If you stumble here, your confidence crashes.

    Fortunately, you do not need to be a creative genius to score a CLB 9. You just need a reliable structure. Specifically, using a proven CELPIP Speaking Task 1 template ensures you never run out of things to say.

    Below is the exact formula to organize your thoughts, sound natural, and finish perfectly on time.

    The Secret to Task 1: Empathy First

    Admittedly, most students jump straight to the advice. They say, “You should take the job.”

    However, this is a mistake. The raters are grading you on “Task Fulfillment” and “Tone.” In Task 1, you are talking to someone you know. Therefore, you must sound supportive, friendly, and empathetic.

    Consequently, a great CELPIP Speaking Task 1 template always starts with a “Buffer”, a sentence that acknowledges the person’s situation before telling them what to do.

    The 4-Part “Pro” Template

    Next, let’s break down the structure. Do not improvise. Instead, follow this simple roadmap every single time.

    1. The Warm Greeting (5 Seconds)

    Start with a natural, friendly opening.

    • Formal: “Hi John, thanks for reaching out to me.”
    • Informal: “Hey Sarah, it’s so good to hear from you!”

    2. The Buffer (10-15 Seconds)

    Immediately show empathy.

    • “I heard about your situation, and I completely understand why you are stressed.”
    • “That sounds like a tough choice, but I think I can help you decide.”

    3. The Advice (60 Seconds)

    Crucially, you need to provide two distinct pieces of advice, not just one. Use transition words to separate them.

    • Advice 1: “First, I think you should…” (Explain why).
    • Advice 2: “Also, have you considered…” (Explain why).

    4. The Warm Closing (5-10 Seconds)

    Finally, sign off naturally.

    • “Anyway, let me know what you decide. I’m here for you.”
    • “Good luck! Talk soon.”

    Seeing the Template in Action

    Now, let’s apply this CELPIP Speaking Task 1 template to a real prompt: Your friend is deciding whether to buy a car or a motorcycle.

    “Hey Mike, thanks for asking for my opinion. (Greeting)

    “I know this is a big purchase, and honestly, both options sound really exciting.” (Buffer)

    “First, if I were you, I would probably go with the car. The main reason is safety. Since you drive on the highway every day for work, a car offers much better protection than a bike, especially in the winter.” (Advice 1)

    “On the other hand, if you really want the thrill of a bike, you could buy a cheaper used motorcycle just for weekends. That way, you get the fun without risking your daily commute.” (Advice 2)

    “Anyway, that’s just my take on it. Let me know what you pick!” (Closing)

    Why Memorizing Isn’t Enough

    Ultimately, having a CELPIP Speaking Task 1 template is only 50% of the battle.

    You can have the perfect structure, but if your grammar is weak or your pronunciation is unclear, you will still get a CLB 6. Unfortunately, a PDF template cannot correct your mistakes.

    In fact, relying solely on memorized scripts can make you sound robotic, which lowers your score.

    Consequently, you need dynamic feedback. This is why Exam Hero is essential.

    • Tone Analysis: Our AI listens to your voice. Do you sound friendly? Or do you sound like you are reading a script?
    • Grammar Correction: We catch the small errors (like “advice” vs. “advise”) that human tutors miss.
    • Time Management: Practice with our timer to ensure you hit that perfect 90-second mark every time.

    [Master Task 1 with the Smart AI Coach today.]

  • CELPIP General vs CELPIP LS: Which One Do You Actually Need?

    CELPIP General vs CELPIP LS: Which One Do You Actually Need?

    You are ready to book your English test. You go to the website, credit card in hand. Suddenly, you see two options: CELPIP General and CELPIP General LS.

    Immediately, you hesitate. One is cheaper. One is shorter. But which one is right for your application?

    Undoubtedly, choosing the wrong test is a costly mistake. If you book the LS when you need the General, immigration will reject your application. Conversely, booking the General when you only need the LS is a waste of time and money.

    Below is the definitive guide to CELPIP General vs CELPIP LS so you can book with confidence.

    The Core Difference: Purpose (PR vs. Citizenship)

    First, let’s look at why you are taking the test. This is the main deciding factor.

    • CELPIP General: This is the “standard” test. Specifically, it is required for Permanent Residency (PR) applications, such as Express Entry, the Federal Skilled Worker Program, and the CEC.
    • CELPIP General LS: The “LS” stands for Listening and Speaking. Exclusively, this test is accepted for Canadian Citizenship applications.

    Therefore, the rule is simple: If you want PR, you must take the General. If you already have PR and are applying for Citizenship, you can take the LS.

    Format Comparison: 4 Skills vs. 2 Skills

    Next, let’s compare the actual exam experience. Surprisingly, the difference in difficulty is significant because the LS removes the two hardest sections.

    CELPIP General (The Full Test)

    • Duration: ~3 hours.
    • Sections: Listening, Reading, Writing, and Speaking.
    • Difficulty: Higher. You must write emails, respond to surveys, and read complex texts.

    CELPIP General LS (The “Light” Version)

    • Duration: ~1 hour and 10 minutes.
    • Sections: Listening and Speaking only.
    • Difficulty: Lower. Crucially, there is no Reading and no Writing section.

    Consequently, if you are eligible for the LS, it is a much easier experience. You walk in, complete the audio/verbal tasks, and leave in just over an hour.

    Cost Comparison: Save Your Money

    Furthermore, the price difference is a major factor for many applicants.

    • CELPIP General: Approximately $280 CAD (+ tax).
    • CELPIP General LS: Approximately $195 CAD (+ tax).

    Obviously, saving nearly $100 is attractive. However, do not let the price tempt you into booking the wrong test. Unfortunately, IRCC is very strict. You cannot use the LS for Express Entry just to save money.

    Can I Take the General for Citizenship?

    Yes. This is a common question.

    If you took the CELPIP General for your PR application 2 years ago, can you use those results for Citizenship?

    Typically, yes, if the results are still valid (usually less than 2 years old) or if you submit them as proof of past language ability (check specific IRCC rules for your case). However, if you are booking a new test specifically for Citizenship, there is absolutely no reason to take the full General test. Stick to the CELPIP General vs CELPIP LS winner: the LS.

    Don’t Study What You Don’t Need

    Ultimately, knowing which test to take changes how you study.

    If you are taking the LS, studying “Writing Task 2” is a complete waste of your time. Conversely, if you are taking the General, ignoring the Reading section guarantees failure.

    Consequently, you need a study plan that matches your specific exam.

    This is where Exam Hero excels.

    • Customized Training: When you sign up, you select your test type. Our AI instantly hides the sections you don’t need.
    • Targeted Practice: LS students focus 100% on Listening and Speaking. General students get the full 4-skill workout.
    • Smart Feedback: Whether you are practicing for PR or Citizenship, our AI rates your speaking to ensure you hit the CLB level you need.

    [Select your test and start your custom study plan with Exam Hero.]

  • CELPIP Listening Task 5 Tips: Mastering the Video Section

    CELPIP Listening Task 5 Tips: Mastering the Video Section

    You are comfortable with audio. You are ready for the interviews. But then, the screen changes, and you see actors talking in a coffee shop. Suddenly, you aren’t just listening; you are watching.

    Undoubtedly, CELPIP Listening Task 5 is the most unique and stressful part of the exam. Unlike the other sections, you must track visual details while simultaneously following a complex conversation.

    Consequently, many students fail this section simply because they do not know where to look. Below are the essential CELPIP Listening Task 5 tips to help you focus your attention and boost your score.

    The Golden Rule for CELPIP Listening Task 5

    Specifically, the biggest mistake test-takers make is focusing 100% on the actors’ faces.

    In reality, the test questions often focus on the background or physical details. For example, you might be asked, “What was the man holding?” or “What color was the sign on the wall?”

    Therefore, your eyes must be moving constantly. Do not just watch the speakers. Instead, scan the scene like a detective. This strategy alone can save you valuable points.

    Tip #1: Organize Your Notes (The “T-Chart”)

    First, you must have a system. You cannot write down every word. Specifically, we recommend using a “T-Chart” on your scratch paper to separate what you hear from what you see.

    • Left Column (Audio): Write down keywords about the topic, the problem, and the solution.
    • Right Column (Visual): Write down quick notes about clothing (e.g., “Red hat”), objects (e.g., “Laptop”), and setting (e.g., “Busy cafe”).

    Admittedly, this takes practice. However, it ensures you don’t confuse who said what or what they were wearing.

    Tip #2: Listen for “Agreement” and “Disagreement”

    Next, pay close attention to the emotional tone. CELPIP Listening Task 5 almost always involves two or three people discussing a problem.

    Crucially, questions often ask about the relationship between the speakers. Do they agree? is one person angry?

    Consequently, you should write down symbols like (+) for agreement or (-) for disagreement next to your notes. This shorthand helps you answer questions about attitude quickly without relying on memory.

    Tip #3: Anticipate the Questions

    Finally, use the “prep time” wisely. You cannot see the questions while the video is playing. However, once the video ends, you have a brief moment before the questions begin.

    Immediately review your visual notes. Remind yourself who was wearing what. Typically, the first few questions are about the scene, and the later questions are about the dialogue. Preparing your brain for this sequence helps reduce panic.

    Why You Cannot Practice This with a Book

    Unfortunately, reading about CELPIP Listening Task 5 tips is not enough. You cannot practice watching a video by reading a PDF.

    In fact, relying on static books is the main reason students struggle with this task. You need to train your eyes and ears to work together in real-time.

    Ultimately, this is why you need the Smart AI Coach.

    • Real Video Simulations: Practice with realistic video scenarios that mimic the actual test.
    • Active Note Training: Learn exactly what to write down and what to ignore.
    • Instant Feedback: Find out immediately if you missed a visual detail or an audio cue.

    [Start practicing with realistic Video Tasks on Exam Hero today.]